
We often get asked if it’s possible to add more than one watermark (stamp) to a PDF page.
Yes! That’s easy!
With PDF Ink you can add up to four watermarks on each page using the built-in WordPress backend plugin settings panels, and even more than that if you choose to override our arbitrary limit of 4. We call each watermark on the page a “placement.” So there are four placements (or more, if you don’t mind using a little code).
Each placement can be anywhere on the page, in a different font size and color. Maybe one mark will have rotated text, and maybe one mark is actually an image, like your company logo. Heck, maybe one of the marks will be a QR code or the page number. Because you can have several placements, it becomes clear how PDF Ink could be used to customize gift certificates or other documents on-the-fly.
Maybe you’d like one placement to be invisible? Not only is that possible, it’s smart! When most people think of watermarks they think of something that is visible, but hiding a transparent mark on your PDF is a smart security move.
Using WordPress hooks you can even skip placements for specific pages or ranges of pages. We’ll show how to do that below, too.
How to Set Up a PDF With Various Marks
Protecting and branding your PDF files is important, we get it. Watermarks serve as an effective way to assert ownership and prevent unauthorized use of your PDFs. While most competitors allow you to add a single watermark, PDF Ink allows you to add multiple watermarks per page. Here’s how to do that, starting with Placement #1:
Steps:
- Log into your WordPress admin and go to the PDF Ink -> Frontend settings panel.
- The first panel of settings (“PDF Setup”) are fine left in default for now. Scroll to Placement #1
- Type your content in the content box. Examples might be “CONFIDENTIAL” or “Licensed to [FIRSTNAME] [LASTNAME] until [DATE-1YR].” or “Thank you for your purchase, [FIRSTNAME]!”
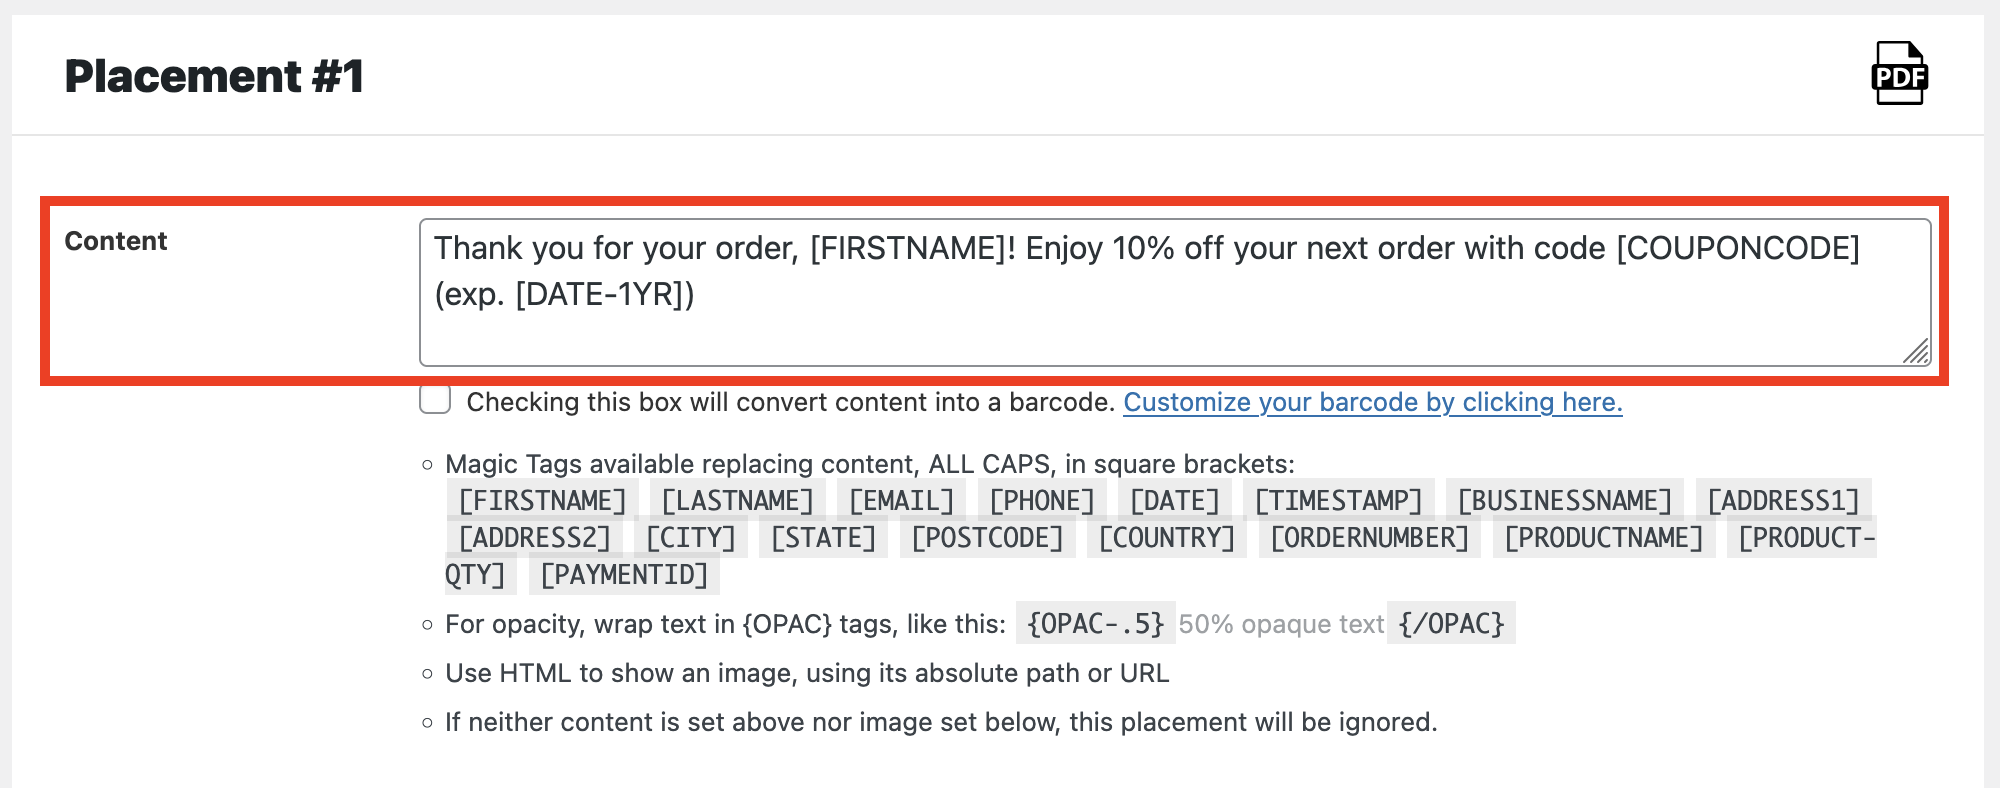
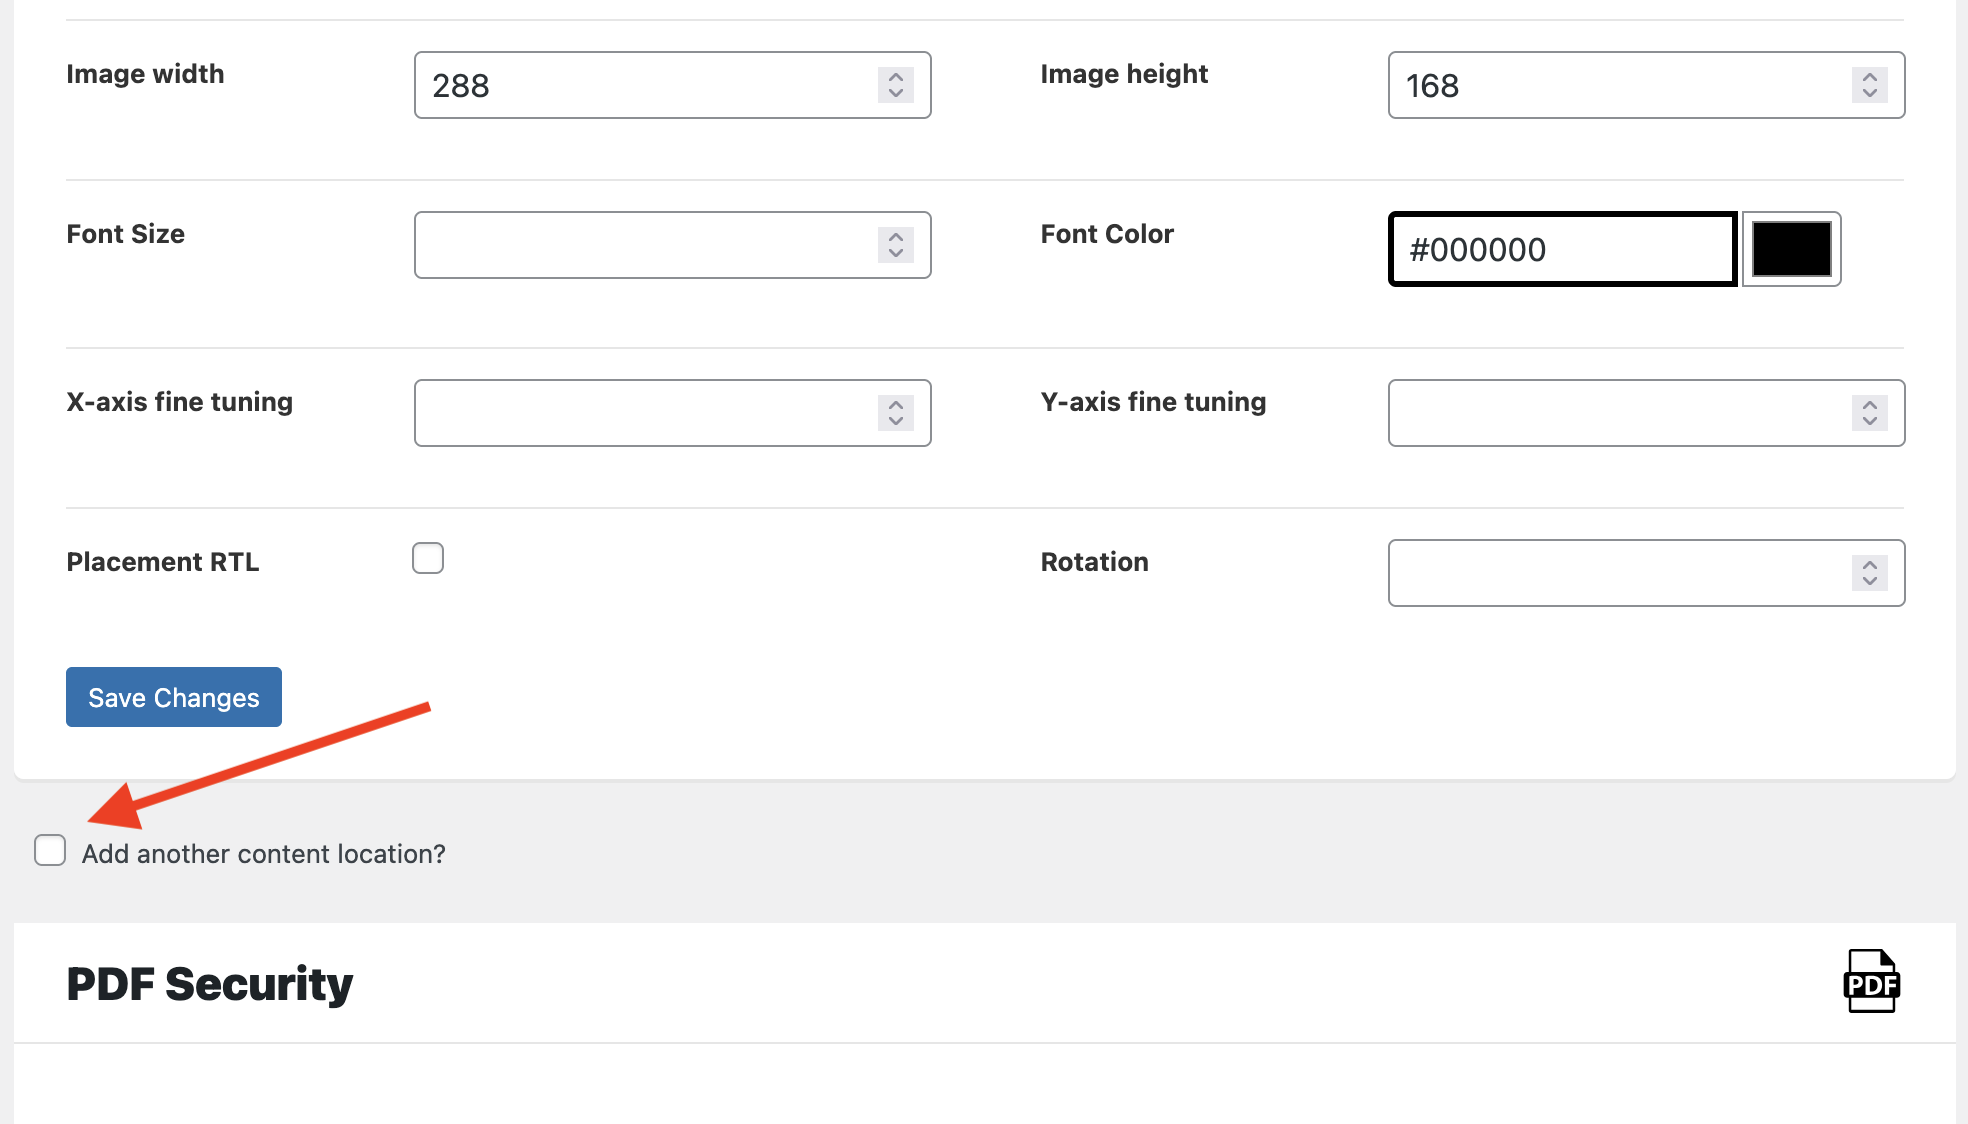
- Lower in the Placement settings panel, maybe set a font size and color (defaults to 12pt black) and use the adjusters to move the mark around the page. The main margin settings at the top of the settings page create the page boundary.
- Ready to add a second placement? Scroll to the Placement #2 settings panel, and add that! It’s that easy.
- Ready to add a third placement? Well, those are hidden to keep the page from being looooooong. Click the checkboxes to add 1-2 more placements.

If you want to have more than four placements on one page, that’s possible with a PHP snippet. If your website is hosted on affordable shared hosting, having more than a couple placements might be too much demand on your server, though.
Using Filter Hooks to Skip Placements by Page
In the main settings, you can choose which pages to watermark. But what if you want to skip specific pages for specific placements? For example, what if you do not want placement #1 to show on the first page? Maybe placement #1 contains your logo and you don’t want the logo stamped on the first page. Well, you can use a little code snippet for that:
/**
 * @param bool Whether to skip or not
 * @param int $key Placement number (increments from 0)
 * @param int $page_number Page number (increments from 1)
 * @param array $settings
 */
function pdfink_skip_a_placement( false, $key, $page_number, $settings ) {

    if ( 1 === $page_number && 0 === $key ) {
        // We are on the first page, first placement, so skip
        return true;
    }
    return false;

}
add_filter( 'pdfink_skip_placement', 'pdfink_skip_a_placement', 10, 4 );
This code snippet would be added to your WordPress child theme functions.php file or you could add it using the “Code Snippets” WP plugin. If you do not have a developer and need help arranging customized code for page-by-page watermarking, get in touch!