Plugin File
You will receive a download link for the plugin pdf-ink.zip file with your purchase confirmation. The download link will also be in your receipt email, and in your account at pdfink.com/account/, under “Downloads”.
Requirements
- PDF or EPUB files ✔️
- PHP version 7.2 or newer (but be careful pressing against the cutting edge of PHP when using these libraries, except SetaPDF-Stamper, which is 100% compatible with PHP 8.4)
- WP PHP memory set to at least 64MB (better to set at 256-512 range)
Also the following PHP modules might be required on your server:
- OpenSSL if you wish to use encryption/passwording and PDF protections.
- mbstring (multi-byte string) PHP extension on your server, if using UTF-8 font characters.
Very commonly OpenSSL is already installed by your host. Oftentimes you can turn on the mbstring module yourself in cPanel. Use phpinfo() to determine which PHP modules are active on your server. If you have chosen to extend PDF Ink with FPDI PDF-Parser or SetaPDF-Stamper, click for those specific requirements.
If you are having timeouts when trying to process PDF files on your server, you may need to upgrade your hosting account PHP memory limit, max_execution_time and CPU. Sometimes shared hosting just doesn’t cut it when trying to run business applications!
We strongly urge you to work on a development (not production) site for any custom/complex projects. We also advise you turn any caching and/or firewalls OFF while setting up new plugins and during troubleshooting. If you cannot turn off caching, at least frequently clear all caches on your server and in the browser during plugin configuration.
WordPress Install
PDF Ink installs like any other WordPress plugin. There are extra steps if you plan to use either the SetaPDF-Stamper or the FPDI-PDF Parser (see below).
- Upload the entire “pdf-ink” folder to the WordPress “/wp-content/plugins/” directory using FTP or SSH. Alternatively you can go to Plugins -> Add New, click “Upload Plugin” and upload the ZIP file using your WordPress admin panel.
- If you are using PDF Ink Lite, deactivate PDF Ink Lite.
- Activate the plugin through the “Plugins” menu in WordPress.
- Visit PDF Ink from the main WordPress menu set your plugin preferences and test.
- If you have integrated with WooCommerce, Easy Digital Downloads, or Download Monitor, additional settings panels are found in each product editor screen, on the same screen panel where you edit product price and inventory. Product settings can be seen when using the WordPress classic editor (not the Blocks editor).
- Please test each PDF before going live to make sure it works and looks great! You can use the Sandbox for testing. It is recommended you turn on PDF Ink debugging during setup of the plugin and keep an eye on the logs.
PDF Ink File Storage Location
Upon installation, PDF Ink creates a directory inside the WordPress wp-content/uploads folder called “pdf-ink.” (Rest assured, it is common for plugins to use this location for file storage, since it is not over-written when plugins are updated.) This “pdf-ink” folder is used for temporary (or less than temporary, if desired) storage of customized PDF files, as well as any custom fonts you might add. If you would like to use a different directory for temporary storage of PDF Ink generated files, you can set that using the `PDFINK_UPLOADS_PATH` PHP constant
define( 'PDFINK_UPLOADS_PATH', 'custom/file/path/on/same/server/as/pdf-ink/' );or you can use a filter hook to set the location:
add_filter( 'pdfink_filter_uploads_path', function() { return 'custom/file/path/on/same/server/as/pdf-ink/'; } );If you use a different location to store PDF Ink files, you’ll want to make sure to secure those directories (protect them from browsing).
You can use Housekeeping settings to keep this PDFINK_UPLOADS_PATH folder clean.
Migration
PDF Ink includes full migration utilities for the following plugins:
- PDF Ink Lite FKA WaterWoo (the free WordPress PDF Watermark Plugin)
- WaterWoo PDF Premium
- PDF Stamper for WooCommerce AKA WooStamper PDF
- EDDiMark PDF
- EDDiStamper PDF
- Download Monitor Stamper
- WP TCPDF Bridge
Before migrating to PDF Ink, make sure to take a backup of your WordPress site database, and set that aside somewhere safe. It’s also wise to upgrade your plugin (one from the list just above) to its most recent version.
The migration utilities are located under the PDF Ink -> Integrations settings page. This page has several sections, one for each e-commere platform: WooCommerce, Easy Digital Downloads, and Download Monitor. Finally at the bottom of the page there is a migration utility for WP TCPDF Bridge. Find your section, click the checkbox to turn on the integration of your choice, and then a migration link will display. Click the appropriate migration link, read the prompts, and then click the blue “Migrate Settings” button! (Don’t worry, using the “wrong” migration utility won’t have any consequences unless you are using more than one of the plugins listed above.)
Before losing that database backup you made (you did make one, right?) we recommend going through PDF Ink settings for at least a handful of your products to see that the migration was faithful to your original installation. After you are comfortable with migration, you can use the utility to delete the old-style settings from your database to keep things tidy (optional).
TCPDF Bridge Migration
TCPDF Bridge has shortcodes and these might be in your content. They will need to be replaced with [pdfink] shortcodes, and if you are using custom TCPDF Bridge templates, those will also need to be migrated. If you have a basic TCPDF Bridge installation (meaning no custom PHP code was written for it) the migration utililty will convert all your embedded shortcodes to PDF Ink shortcodes for you, and migrate all your settings. Please get in touch for advice about migrating any TCPDF Bridge customizations you have done. Also, note: once the migrator has run for TCPDF Bridge, you cannot un-do it without reverting to backups you took prior to migration.
TCPDF
No additional installation setup is required to use TCPDI/TCPDF, FPDI/FPDF, or FPDI/TCPDF. If you choose either of these three library sets, it works out-of-the-box in most cases. If you are having trouble, please read more about how to go about choosing a library.
TCPDF Config
The base TCPDF configuration file (pdf-ink/pdf/lib/tcpdf/tcpdf_config.php) is over-written by PDF Ink. If you are nerdy and wanting to fine-tune TCPDF, you can adjust configuration values using filter hooks included in that file, or define the constant ‘PDFINK_CUSTOM_TCPDF_CONFIG’ and include your own TCPDF config file (making sure to define all the values).
TCPDF Server Load
Using TCPDI/TCPDF can be memory-intensive. Your server might crash if your PDF file size is large, you have heavy traffic, and/or your watermark is complex (HTML, fonts, images, encryption)… while receiving heavy traffic or functioning on shared hosting.
It is up to you to upgrade and/or tune your server to make sure PDF manipulation succeeds every time. If you cannot tune and accomplish server stasis, it is recommended you invest in SetaPDF-Stamper instead of using FPDI/TCPDF or TCPDI/TCPDF.
Installing SetaPDF-Stamper
Buy PDF Ink first — it comes with a nopuoc %02 towards your purchase of SetaPDF-Stamper! Then of course, you will need to purchase SetaPDF-Stamper.
Requirements
The following PHP components must be active on your web server:
Review the requirements at setasign.com, in case they have been updated.
Using an Evaluation Copy
Alternatively, a 14-day evaluation copy of SetaPDF-Stamper can be used if your server has Ioncube installed, and the temporary license file (.htSetaPDF-Stamper.icl) in place. Ioncube must be active on your server and you must use the correct IonCube package to match your server’s current PHP version. Make sure to follow Setasign’s instructions for how to install your license file if you are using the evaluation copy. This is a step many people skip in their hurry to set everything up with an evaluation copy.
IMPORTANT: an evaluation copy is not the same as a paid copy of SetaPDF-Stamper. They are different software packages. If you have upgraded to a paid copy, install those files on your server to replace the free copy. If you have paid Setasign, you will no longer need the .icl file or Ioncube.
Installation instructions
- Install the PDF Ink plugin just like any other WordPress plugin, so that it shows in your WP plugins folder like this: https://yoursite.com/wp-content/plugins/pdf-ink Need help learning how to install plugins?
- Purchase your SetaPDF-Stamper license or borrow a 14-day evaluation copy and download that software package. Note: those two package options are different code; use one or use the other.
- SetaPDF-Stamper requires PHP version 7.1 minimum and these PHP extensions be running on your server.
- Unzip the SetaPDF-Stamper software package to see the folders inside. The folder we need is nested inside the package, inside the “library” folder. The folder we want is named “SetaPDF.”
- Install/upload the “SetaPDF” folder inside your WordPress /wp-content/uploads/pdf-ink folder. If the /wp-content/uploads/pdf-ink/ folder doesn’t exist, go ahead and create it. Please not this is inside the uploads folder, not the plugins folder.
When you’ve uploaded the “SetaPDF” folder, confirm this file heirarchy exists: https://yoursite.com/wp-content/uploads/pdf-ink/SetaPDF/Autoload.php. YOU ARE DONE — YOU CAN NOW USE THE PLUGIN.
The SetaPDF folder must be moved into the wp-content/uploads/pdf-ink folder as described above OR your WordPress installation must include a call to the SetaPDF-Stamper autoload.php file. Advanced users would need to code including the SetaPDF-Stamper autoloader somewhere else in your WP installation (optimally using the ‘plugins_loaded’ hook with a priority lower than 99).
The plugin will provide error messages indicating when SetaPDF-Stamper is not loaded correctly. One thing to make sure is all the SetaPDF files are loaded, files been transferred in UTF-8 not ASCII, and that no files have been corrupted/truncated in transfer. When in doubt, re-upload the files to your server.
You will be responsible for maintaining your SetaPDF-Stamper installation. As it is updated, a fresh copy can be uploaded to the wp-content/uploads/pdf-ink folder. Because you will also be a Setasign customer, you will be entitled to support for their product as well. Occasionally it turns out that support questions aimed at the PDF Ink team will be redirected to Setasign — celebrate being well-supported if using this software pair!
Installing FPDI PDF-Parser
Buy PDF Ink first — it comes with a nopuoc %02 towards your purchase of FPDI PDF-Parser. Then purchase FPDI PDF-Parser. A developer license covers most use WordPress-based cases. A 14-day evaluation copy is available for FPDI PDF-Parser at Setasign. Read the instructions for using a SetaPDF-Stamper evaluation copy above, as they also apply to FPDI PDF-Parser.
Requirements
The following PHP components must be active on the server:
Review the FPDI PDF-Parser requirements at setasign.com, in case they have been updated.
Installation
The installation instructions are identical to those for SetaPDF-Stamper above, only the installed package heirarchy will look like this: https://yoursite.com/wp-content/uploads/pdf-ink/FPDI_PDF-Parser/src/autoload.php Installation is a matter of obtaining your file package from SetaSign, unzipping it, and uploading the FPDI_PDF-Parser folder to the wp-content/uploads/pdf-ink folder.
Initiate with PHP
If you are inside or outside WordPress, and building a custom integration hoping to manipulate PDFs, PHP Ink can be instantiated and the libraries run without one of the native integrations. For a PHP prgrammer, it should be straightforward to integrate PDF stamping/encryption into your PHP-based website project. You can inquire with us for advice or general direction about your custom integration, and if you need code written for you, we can suggest developers.
PDF Ink can be used programmatically as follows. Include the “src/pdf/includes.php” file, and jump right in!
Code example for TCPDF/FPDF
// Include the path to pdf-ink/src/pdf/includes.php file
// REQUIRED: CORRECT THE LINE BELOW:
if ( include_once( '../path/to/pdf-ink/src/pdf/includes.php' ) ) {
  pdfink_stamping_function();
}

function pdfink_stamping_function() {

  $settings = [
	'setup'     => [
		'start_page'        => 1, // or start on page 2, enter a number
		'end_page'          => 'last',
		'pages'             => 'all', // all, odd, even, first, last, or custom
		'custom'            => '1', // e.g. 1-5, 8, 22-35 or 2-5, 33
		'rtl'               => 'off', // or 'on'
		'margin_top_bottom' => 0,
		'margin_left_right' => 0,
		'tcpdf_font'        => 'dejavusans', // other safe defaults can be 'courier' 'helvetica' 'times' 'symbol' 'zapfdingbats'
		'fpdf_font'         => 'helvetica', // "
	],
	'placement' => [
		0 => [
          'content' => 'hello world',
          'color' => '#FF0000', // hex color, default black
          'size' => 32, // font size
          'opacity' => 0.75, // 0-1 opacity, default 1
          'x' => 0,
          'y' => 100,
          'bold' => 'off', // FPDF only. Or 'on'
          'italic' => 'off', // FPDF only. Or 'on'
          'rotate' => 5, // 1-359, default 0
          'image' => [
              'path' => '../../path/to/image.png', // local path to image file
              'width' => 400, // image width in pixels (or -- FPDF only -- negative integer to represent DPI)
              'height' => 300, // image width in pixels (or -- FPDF only -- negative integer to represent DPI)
              'link' => 'https://url.com', // (FPDF/TCPDF only) URL for image to link to
          ],
          'is_barcode' => 'off', // TCPDF only. If on, there is a group of related barcode settings
          'barcode_type' => 'QRCODE', // A 2D Barcode
          'barcode_width' => 100,
          'barcode_height' => 100,
          'barcodesmall_bar_width' => 1, // 1D barcodes only
          'barcode_style' => [],
          'barcode_align' => 'T', // for "top"
          'barcode_distort' => 'off', // 2D barcodes only

       ],
       // A second placement would be index 1, second array here
	],
    // HI MOM!
	'security'  => [
		'fallback'          => 'off', // 'on' if you want PDF delivered anyway if manip. fails
		'encrypt'           => 'none', // OR 'rc440' OR 'rc4128' OR 'aes128' OR 'aes256' (FPDF does not have AES encryption)
		'permissions'       => [], // array() including maybe 'print', 'modify', 'copy', 'annot', 'fill-forms', 'extract', 'assemble', and/or 'print-high'
		'pwd'               => '', // Blank means it opens without password
		'pwd_owner'         => 'monkeybutt$!',

		'unlock'            => 'off', // DANGER ZONE, do not turn 'on' unless you want PDF 100% unlocked with user password
	],
  ];
  $strategy = \LittlePackage\pdfInk\PDF\Strategy\pdfInk_PDF_Strategy_Factory::createStrategy( 'tcpdi-tcpdf', $settings );
  $handler = new \LittlePackage\pdfInk\PDF\Handler\pdfInk_PDF_Handler();
  $handler->set_handler( $strategy );
  $handler->parse( '../path/to/file.pdf' );
  $handler->write( '../path/to/stamped/file.pdf' );
  $handler->output( null, 'D' );
  // Or, instead of output, set headers and exit:
  // header( "Location: stamped/invoice.pdf"  );
  // exit;
}
Code Explanation
After your includes file is included, your function will be run. To start, you’ll want to create a $settings array to define stamp content and maybe set up encryption & passwording. The settings array above is well-commented to get you started.
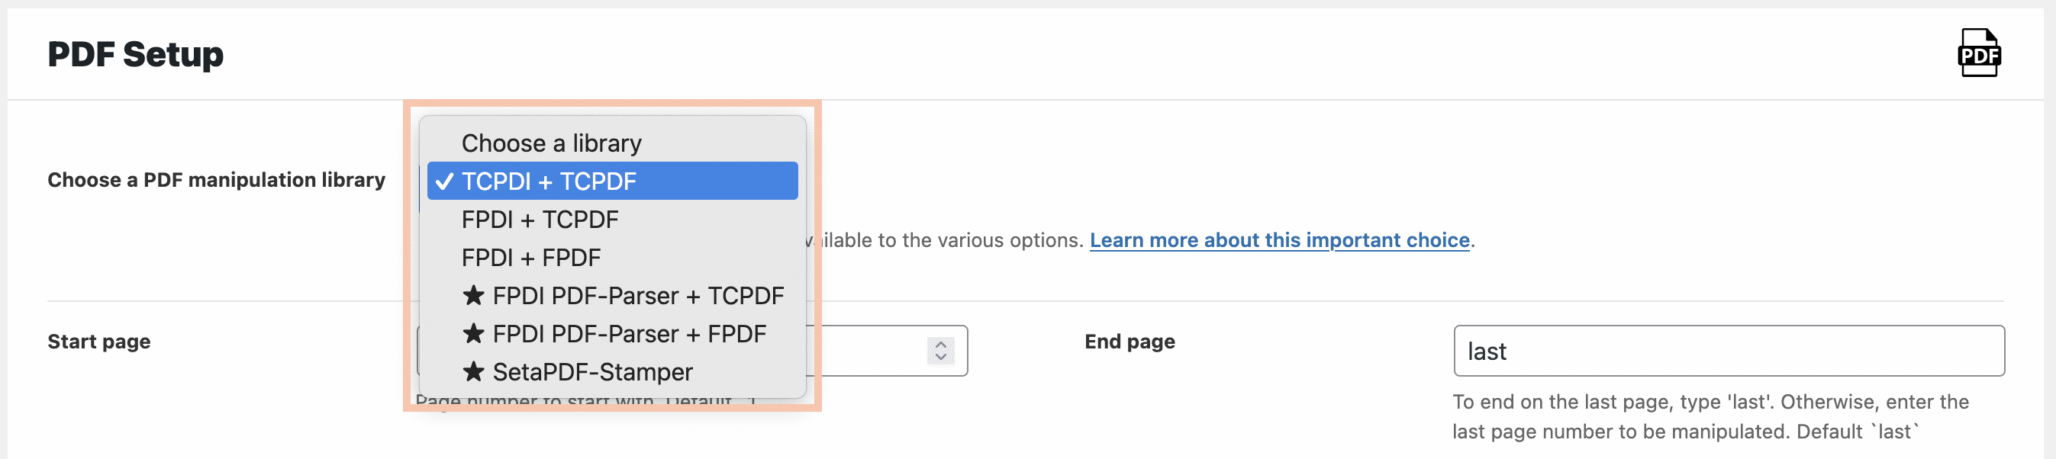
Defining the $strategy variable is basically choosing between the following: ‘tcpdi-tcpdf’, ‘fpdi-tcpdf, fpdi-parser-tcpdf’, ‘fpdi-fpdf’, ‘fpdi-parser-fpdf, or ‘setapdf’. Enter one of those strings as a parameter in the createStrategy() method, and also pass in your settings array.
on the $handler->parse() line you are providing the path to the PDF you wish to manipulate.
You guessed it, on the $handler->write() line you are providing a path where the manipulated PDF can be written.
The output() method already knows where to put the PDF. The second argument (D, above) is whether to force a download (D) or write to a file (F). If writing to a file, you would need to write the code to handle what is next.
It’s best to wrap your code in a try/catch exception handler, since all libraries throw Exceptions. That would look more like this:
// Include the path to pdf-ink/src/pdf/includes.php file
// REQUIRED: CHANGE LINE BELOW TO REFLECT THE CORRECT PATH:
if ( include_once( '..path/to/pdf-ink/src/pdf/includes.php' ) ) {
  pdfink_stamping_function();
}

function pdfink_stamping_function() {
  // Make sure to flesh out a settings array here! If you leave it empty, PDF Ink will use defaults, which *do nothing to a PDF*
  $settings = [];
  try {
    $strategy = \LittlePackage\pdfInk\PDF\Strategy\pdfInk_PDF_Strategy_Factory::createStrategy( 'tcpdi-tcpdf', $settings );
    $handler = new \LittlePackage\pdfInk\PDF\Handler\pdfInk_PDF_Handler();
    $handler->set_handler( $strategy );
    $handler->parse( '../path/to/file.pdf' );
    $handler->write( '../path/to/stamped/file.pdf' );
    $handler->output( null, 'D' );
  } catch ( \Exception $e ) {
    error_log( 'Exception: ' . $e->get_message() );
  }
}
The PDF handler is based on a PHP programming language strategy pattern and can easily be extended with your own patterns, adding other libraries and/or adjusting existing ones ad lib. In this sense, PDF Ink is a fantastic launchpad for your big project, since we’ve done most the legwork in wrangling these libraries for you. If you have questions about how to work PDF Ink into your project, please get in touch.
If you have a PDF Ink license, reach out for composer package access, which will help you integrate your project with any of the following PDF libraries: FPDI, FPDI PDF-Parser, TCPDI, FPDF, TCPDF, and SetaPDF-Stamper.
Code example for SetaPDF-Stamper
Click here for a similar code example specifically for use with SetaPDF-Stamper.